The Ultimate Beginner's Guide to Learning How to Crochet: Step-by-Step Instructions and Tips
- May 9, 2023
- 19 min read

Are you ready to embark on a creative journey and dive into the world of crochet?
Whether you've been inspired by cozy blankets, chic accessories, or adorable amigurumi creatures, learning how to crochet can be an incredibly rewarding experience.
But where do you begin?
That's where we come in!
We've crafted the ultimate beginner's guide just for you, complete with step-by-step instructions and tips for success that will have you hooking up delightful projects in no time.
So grab your favorite comfy chair and let's get started as we unravel the exciting art of crocheting together!
Understanding The Basics Of Crocheting For Beginners
To start your crochet journey, it's important to understand the crochet terminology and materials needed, choose the right crochet hook and yarn, and learn how to make a slip knot and create a foundation chain.

Crochet Terminology And Materials Needed
One of the first steps to becoming proficient in crochet is familiarizing yourself with common crochet terminology and understanding the materials needed for various projects.
Essential terms include abbreviations such as "ch" (chain), "sc" (single crochet), and "hdc" (half double crochet); these notations are commonly found in written patterns, guiding you through stitch sequences and project instructions.
To ensure a smooth crocheting experience, gather necessary materials such as an assortment of crochet hooks, yarns in different weights and textures, stitch markers to track your progress, and tapestry needles for weaving in loose ends or sewing together finished pieces.
With each new technique or project mastered, your collection of tools will grow alongside your skills – ensuring that you have everything you need to continue expanding your crafting horizons.

Choosing The Right Crochet Hook And Yarn
Selecting the perfect crochet hook is crucial for beginners embarking on their crocheting journey.
Familiarize yourself with different materials and sizes, such as aluminum, plastic, or bamboo hooks to determine which feels most comfortable in your hands.
Larger crochet hooks are often recommended for beginners as they provide more manageable stitches when working with standard yarn.
Understanding the nuances of various types of yarn will make a significant difference in your beginner crochet projects.
Yarn weights and fibers vary, so be sure to check the label for hook size recommendations and gauge information.
Opting for smooth textures like acrylic or cotton will simplify your initial crocheting experience while still providing excellent results that instill confidence in your new skill set.
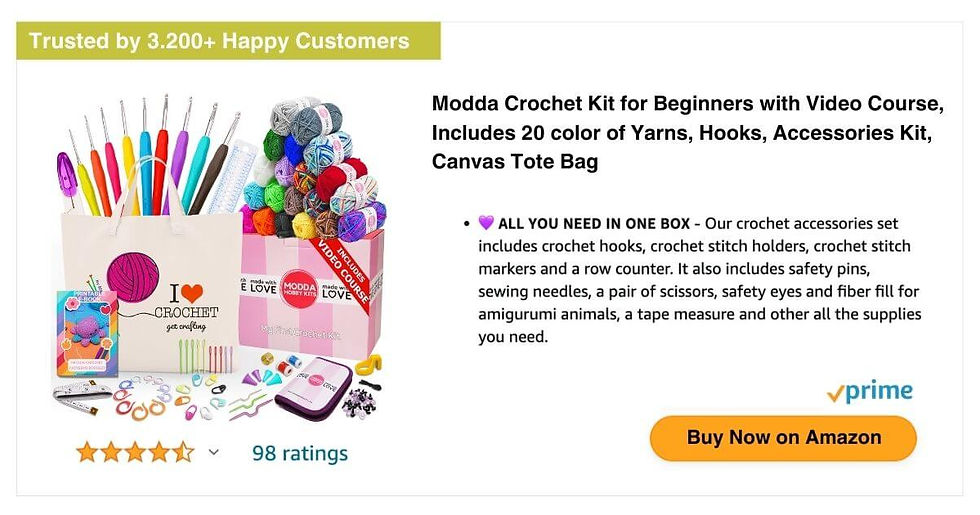
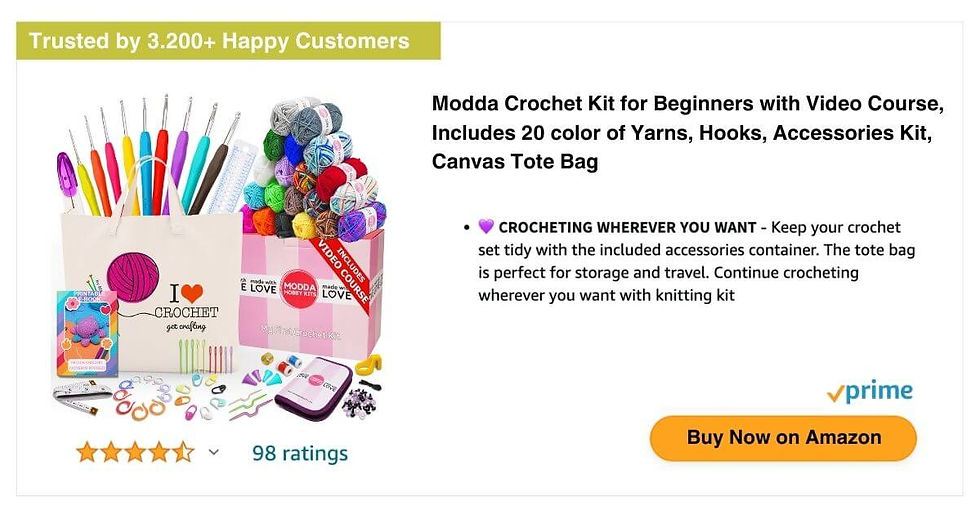
Investing in quality crochet kits tailored to beginners, such as Modda Crochet Kit, can vastly improve your learning process by providing you with essential tools like stitch markers, tapestry needles, step-by-step instructions, and more.
The combination of these resources alongside free online tutorials allows complete newcomers an enjoyable introduction into the rich world of crocheting – setting them up for years filled with stunning handcrafted creations!
Making A Slip Knot And Creating A Foundation Chain
Making a slip knot and creating a foundation chain are the first steps in learning to crochet.
To start, simply tie a loop using the yarn and then pull the end through it to form the slip knot.
Once you've made your slip knot, begin your foundation chain by chaining a few stitches; this will serve as the base for your crochet project.
It's important to note that making a slip knot properly is crucial in order for everything else to fall into place.
Luckily, with just a bit of practice, anyone can master this essential skill.
Similarly, while creating your foundation chain may seem daunting at first, following step-by-step instructions is key when starting out with any new skill or hobby.
With these basic building blocks down pat, you'll be well on your way towards crocheting greatness!

Step-by-Step Instructions For Crocheting
Learn how to crochet with easy-to-follow step-by-step instructions, including how to hold the crochet hook, tie a slip knot, yarn over, make a starting chain, work single crochet stitches and more.
How To Hold The Crochet Hook
When learning how to crochet, one of the first things beginners need to master is how to hold the crochet hook.
There are different ways to hold a crochet hook depending on personal preferences and comfort.

Itchin' for Some Stitchin' provides a step-by-step guide for holding the yarn properly while Craftsy recommends starting with the tail hanging down and pinching it between the thumb and ring finger.
The pencil grip is another popular way of holding a crochet hook, where the hook is held like a pencil.
However, there is no wrong or right way to hold a crochet hook; finding what works best for you individually is key.
Comfortable grips can make crocheting more enjoyable as well as lead to faster work times!

How To Tie A Slip Knot
One of the basic steps in crocheting is tying a slip knot, which provides a secure starting point for your project.
To make this knot, simply create a loop with the yarn and pull one end through to produce a knot that can easily slide on and off the crochet hook.
For beginners learning how to tie a slip knot, there are two common ways: pinch method and thumb method.
In the pinch method, you hold the tail of the yarn with one hand while creating an X-shape with your fingers on top of it.
Then take the working end and tuck it underneath before slipping it over your finger from behind to form another loop within an existing loop.
Lastly, slide this new loop onto your crochet hook before pulling tight.
The thumb method starts by wrapping some amount of yarn around your fingers like you're making an "OK" sign while leaving enough tail hanging down at the bottom so you can adjust later if necessary.
Next up is sliding this ring off of just one finger so that its “mouth” opens towards where all those other loops will go (i.e., toward you).
Afterward, insert your crochet hook into what’s now become a hole or opening then pull gently until snug!

How To Yarn Over
Yarning over is a fundamental technique in crocheting that involves wrapping the yarn over the crochet hook.
To do this, you begin by inserting your hook under the working yarn and then looping it up and over to create a new loop on your hook.
This creates what is known as a "yarn over" stitch.
To work with yarn overs, you first need to know how to hold your crochet hook properly.
Once you have mastered this skill, learning how to make slip knots, foundation chains, and single crochets will be much easier.
With consistent practice and attention to tension and gauge, you'll soon be able to create beautiful crochet projects with ease!

How To Make A Starting Chain
Learning how to make a starting chain is the first step in crocheting.
To begin, create a slip knot by making a loop with your yarn and pulling one end through it, then tighten the loop around your crochet hook.
Next, hold your hook in your right hand (or left if you're left-handed) and yarn over by wrapping the yarn once around your hook counterclockwise.
To create a foundation chain, insert your crochet hook into the slip knot and pull up another loop of yarn before pulling that loop through the first loop on your hook.
Repeat this process until you have reached the desired number of chains for your pattern.
Be sure to count each chain as you go along, avoiding common beginner mistakes such as not counting the first chain on the hook or accidentally skipping stitches along the way.

Working Into The Chain
To start the first row of crocheting, you will need to work into the foundation chain that you have created.
This can be a slightly tricky process for beginners as it requires inserting your hook into specific chains and maintaining consistent tension.
The key is to insert your hook underneath both loops of the chain, yarn over, and then pull through to create a loop on your hook.
Once you've successfully worked into all of the chains in your foundation row, you'll turn your work and begin working back in the opposite direction.
It's important to remember that when turning your work, you will make a turning chain which acts as the first stitch of each new row.
Depending on what kind of stitch pattern you're following, this turning chain may count as an actual stitch or simply serve as a spacer between rows.

Single Crochet
Single crochet is one of the most basic and essential stitches in crocheting. It creates a tight and compact fabric, making it perfect for beginners who want to try making simple projects such as dishcloths or scarves.
To make a single crochet stitch, insert your hook into the next stitch on the row below, yarn over, pull through a loop, yarn over again and then pull through both loops on your hook.
It's important to keep your tension consistent when doing single crochet as it can affect the overall appearance of your project.
If you find that your fabric is too loose or tight, adjust the size of your hook accordingly.
Also remember to count your stitches after each row to ensure that you have not added or dropped any accidentally along the way.
With practice and patience, single crochet can be mastered by anyone looking to start their crocheting journey!

Making A Turning Chain
The turning chain is a crucial aspect of crochet projects, especially when it comes to creating the right height for the first row of stitches.
To make a turning chain, start by chaining one or more stitches and then turn your work clockwise.
The number of chains you make will depend on the stitch you're using, so be sure to refer to your pattern or instructions.
It's important to keep in mind that each type of stitch requires a certain number of turning chains.
For example, if you're working with single crochet stitches, you'll need to create one turning chain before starting row two.
Double crochet stitches typically require two or three turning chains, while treble crochet may need four or more.
By mastering this basic technique and understanding how many turning chains are required for each stitch type, beginners can gain confidence in their crocheting skills and create beautiful projects with ease.

Working Row 2
After completing the first row of single crochet stitches, it's time to move on to working Row 2.
This is where you begin building your project and creating the pattern.
To start your second row, make a turning chain before beginning the next stitch.
This will help create a neat edge and maintain consistent tension throughout your work.
Working Row 2 involves repeating the same basic stitch as in the previous row, but now you'll be inserting your hook into each stitch instead of the foundation chain.
Pay attention to how many stitches are needed for each row as this will depend on the pattern being followed.
Remember that consistency in tension is important for a well-finished crochet piece, so take time to practice!

Fastening Off
When you're done with your crochet project, the last step is to "fasten off".
This simply means cutting the yarn and pulling it through the final loop to secure it.
To do so, complete your stitch as usual, but leave a long tail of yarn (about 6 inches) before cutting it.
Then insert your hook into the next stitch and pull the tail all the way through.
It's important to note that fastening off ensures that your project doesn't unravel or come apart over time.
It's also a good idea to weave in any loose ends at this point using a tapestry needle for added security.
With these simple steps in mind, you can create beautiful crocheted pieces that will stand up to use and time.

Tips For Consistent Tension And Gauge
Achieving consistent tension and gauge is crucial when it comes to crocheting.
To avoid inconsistencies in your work, make sure you choose the right crochet hook size, yarn weight, and pay attention to how tightly you hold the yarn.
Experienced crocheters recommend practicing making swatches with spare yarn before starting on your actual project.
One common mistake beginners make is starting with a yarn that is too thin or loosely plied, leading to uneven stitches and wonky edges.
Another mistake is not paying attention to tension- pulling the yarn too tight or leaving it too loose can throw off your stitch count and create inconsistencies in your pattern.
By taking these tips into account, you'll be on your way to producing beautifully uniform crocheted items in no time!
More Crochet Stitches And Techniques
Discover new crochet stitches and techniques to take your skills to the next level.
From increasing and decreasing to crocheting in the front and back loop, this section will help you enhance your knowledge and improve your crochet projects.
Keep scrolling to learn more!
Half Double Crochet
The half double crochet stitch is a popular crochet stitch for beginners to learn. It is similar to the single crochet stitch, but produces a tight fabric and works up more quickly.
To make this stitch, yarn over, insert the hook into the next stitch, yarn over again and pull through all three loops on the hook.
Learning how to make the half double crochet stitch can be done by following step-by-step tutorials online.
Once you have mastered this basic technique, you can expand your skills with variations like increasing and decreasing stitches or working in rounds instead of rows.

Double Crochet
Double crochet (dc) is one of the essential stitches in crocheting.
It is used to create a range of patterns and designs, including blankets, scarves, hats, and more.
To do the double crochet stitch, begin by yarn over once before inserting the hook into the next stitch.
Next, yarn over again and pull through the loop on your hook. You should now have three loops on your hook.
Yarn over for a third time and pull through two loops on your hook twice to complete this stitch.
Repeat this process across each stitch in your row until you reach the end for a stunning result!
Remember that practice makes perfect!
Don't worry if you don't get it right away - with some patience and persistence, you will master this fundamental crochet stitch in no time.

Treble Crochet
The treble crochet stitch, also known as the triple crochet stitch, is a bit more complex than the previous stitches.
It requires three yarnovers before inserting your hook into the next stitch.
This results in taller and looser stitches that can add texture and height to your project.
To make a treble crochet stitch, follow these steps: yarn over twice, insert your hook into the next stitch or chain space, yarn over again and pull through two loops on your hook four times until you have only one loop remaining on the hook.
Remember to count carefully when doing this stitch, as it can be easy to skip or accidentally add an extra yarn over.
Mastering the treble crochet stitch opens up many possibilities for creating intricate designs with unique textures.
Keep practicing and don't forget to refer back to our other tips for consistent tension and gauge throughout your crocheting journey!

Slip Stitch
The slip stitch is a basic crochet technique that serves multiple purposes in projects.
It's often used for joining, adding borders, and creating seamless transitions between rows.
Although it's not technically considered one of the six basic crochet stitches, mastering the slip stitch is an essential skill for beginner crocheters to learn.
While the slip stitch may seem simple at first glance, there are a few tips to keep in mind to ensure success.
First, make sure you're inserting your hook into both loops of the previous row or stitch when working slip stitches across a row.
Additionally, pay attention to your tension as it can impact the final look and feel of your project.
By mastering this versatile technique early on in your crocheting journey, you'll be able to add polished finishing touches and take on more advanced patterns with ease.

Increasing And Decreasing
Increasing and decreasing are essential techniques to learn for crocheting more complex patterns.
Increasing involves adding more stitches to the project, while decreasing involves creating fewer stitches.
To increase, you simply work two or more stitches into the same stitch or space. To decrease, you can skip a stitch or work two or more stitches together.
It's important to keep track of your increases and decreases so that your pattern remains even and proportional.
With practice, mastering these techniques will allow you to create beautiful shapes and designs in your crochet projects.
Working In The Round
Working in the round is one of the most versatile crochet techniques out there. It allows you to create seamless pieces like hats, cowls, and amigurumi animals without having to seam things together afterward.
If you're a beginner crocheter, don't be intimidated by this technique!
With practice and patience, anyone can learn how to work in the round.
To start working in the round, you'll need to know how to make a slip knot and chain stitch.
From there, you'll simply keep making stitches into the center of your circle until it begins to take shape.
Some common stitches used when working in the round include single crochet (sc), half double crochet (hdc), double crochet (dc), and treble crochet (tr).
Don't worry if this sounds overwhelming at first - just take your time with each step and soon enough you'll have beautiful projects that look professionally made!
Crocheting In The Front And Back Loop
When it comes to crocheting, there are many different techniques and stitches to master.
One such technique is crocheting in the front and back loop.
This method involves working specifically into either the front or back loop of a stitch, resulting in a unique texture and pattern.
By using this technique, you can create all sorts of interesting designs and textures in your crochet projects.
It's a relatively simple concept to grasp, but it can take some practice to perfect your technique.
But with time and patience, you'll be able to add this skill to your arsenal of crocheting abilities.

Reading A Crochet Pattern
When starting out in crochet, learning how to read a crochet pattern is crucial.
These patterns are typically made up of abbreviations and symbols that represent specific stitches and actions.
It may seem overwhelming at first, but with practice, reading a pattern will become second nature.
One important aspect to keep in mind is that each pattern should come with a key or legend explaining what each abbreviation or symbol means.
This can be helpful when first starting out or when encountering new symbols.
Additionally, it's essential to pay close attention to the gauge listed in the pattern, as this will ensure your finished piece comes out correctly sized.
Taking the time to familiarize yourself with common crochet terms and their abbreviations will also make reading patterns much easier in the long run.
And don't hesitate to seek out online resources or reach out to fellow crocheters for assistance – there's always someone willing to lend a hand!

Weaving In Yarn Ends
When you finish a crochet project, one of the final steps is to weave in the yarn ends.
This step helps to ensure that your project looks neat and tidy without any loose or dangling threads.
There are different ways to weave in yarn ends, but one common method is using a tapestry needle to thread the end through several stitches at the back of your work.
Another way to weave in yarn ends is by working towards the end that needs to be woven in as you crochet.
For example, if you're making a scarf and need to change colors, you can start crocheting over the old color's tail with your new color as soon as possible.
This technique avoids having too many loose ends when you complete your project.
It's important not only to effectively weave in yarn ends but also not leave them too short when snipping them off so they won't unravel over time.
Taking this extra care will ensure that your finished projects last longer and maintain their shape even after multiple washings or wearings!

Joining Yarn
Joining yarn is an essential skill for any crocheter.
When you run out of yarn in the middle of a project, you'll need to attach more to continue working.
To join a new color or skein of yarn, start by leaving a long tail on both pieces.
Then insert the hook into the stitch where you want to begin using the new yarn and pull up a loop with it.
Next, wrap the old yarn around the hook and pull through both loops on the hook.
Finally, tie off the tails from both skeins together securely and continue crocheting as normal.
It's important to keep in mind that joining yarn can affect your tension and gauge if not done correctly.
Make sure that your stitches are uniform after joining so that your finished piece looks even all over.
Try different methods for joining until you find one that works best for you - there are many techniques available online, including weaving in ends as you go or knotting them together directly.
With practice, joining colors seamlessly will become second nature!
Keeping Track Of Stitches
To keep track of stitches while crocheting, it's helpful to use stitch markers.
These small tools help indicate where an increase or decrease should occur, ensuring the pattern stays on track.
Simply place a marker in the designated stitch and move it along as needed.
Another way to keep track of stitches is to count them after each row or round.
This helps ensure that the correct number of stitches are present and can prevent mistakes from being carried forward.
It's also helpful to mark off completed rows on a piece of paper, so you know exactly where you left off if you need to take a break from your project.
Importance Of Gauge
Gauge is a crucial aspect in crocheting that ensures a perfect-sized finished project.
It refers to the number of stitches and rows per inch, and it can be influenced by various factors such as yarn weight, hook size, and tension.
Without matching gauge before starting a project, your item might end up smaller or larger than intended.
Checking your gauge involves creating a small swatch using the same yarn and hook you'll use for your project.
This helps you determine how many stitches and rows are required to produce an accurate size.
It's recommended to check gauge before beginning each new crochet project because even small differences can significantly impact the final product's fit and look.
Fun And Easy Crochet Projects For Beginners
Get creative and make your first crochet project with these fun and easy ideas for beginners such as a simple scarf, stylish beanie, cute headband or even a cute amigurumi bee!

Crochet A Simple Scarf
Crocheting a simple scarf is one of the most popular projects for beginners.
Most tutorials and patterns will require only basic stitches like single and double crochet, which makes it an easy project to start with.
All you need is worsted weight yarn and a US K/10.5 (6.5 mm) crochet hook.
Not only is crocheting a scarf an enjoyable experience, but it can also be practical as well!
Scarves make great gifts for friends and family members, especially during colder months.
Medium weight (4-ply) yarn is recommended for beginners while lighter or chunkier yarns may be more challenging to work with.
Overall, crocheting a simple scarf could be the perfect first project that you need to ignite your love for crocheting!

Create A Stylish Beanie
One of the fun and easy crochet projects for beginners is creating a stylish beanie.
This project is perfect for those who want to learn basic stitches while making something practical that they can wear during cold weather.
The materials you will need include chunky yarn, a crochet hook, and optional pom-poms.
To create a chunky ribbed beanie, start with creating a foundation chain using your desired size hook.
Then work in half double crochet stitch through the back loop only until reaching your preferred length.
Finally, use slip stitch to join the beginning and end of your beanie together.
You can add embellishments such as pom-poms or tassels to make it look even more stylish!
Make A Cute Headband
One of the easiest and most popular crochet projects for beginners is a cute headband.
With just a few basic stitches, you can create an accessory that's both fashionable and functional.
Plus, it's a great way to practice your tension and gauge while creating something useful.
To get started on your headband project, choose a soft and comfortable yarn in your favorite color.
Solid-colored yarn or natural fibers like cotton or wool are good choices for beginners.
Then, using the single crochet stitch, create rows of stitches until you reach the desired length of your headband.
You can even add some embellishments such as flowers or buttons to make it unique!
Craft Your First Amigurumi: A Cute Bee
Crafting your own amigurumi can be a fun and fulfilling project for beginners in crocheting.
One cute animal to start with is the bee, which is perfect for spring or summer.
With basic stitches such as single crochet and increasing and decreasing, you can create your very own cuddly bee toy.
To make this amigurumi project, all you need are some yarns in black and yellow, a crochet hook (size G/6-4.25mm), some stuffing material like fiberfill, safety eyes or beads for the eyes, and a tapestry needle for weaving in ends.
Simply follow the step-by-step instructions provided in the guidebook included in most crochet starter kits.
Don't worry if it takes time to get used to crocheting at first; practice makes perfect!
And once you finish your first amigurumi bee project, you'll feel proud of yourself and more confident in tackling other projects too.

Improving Your Crochet Skills
To take your crochet skills to the next level, it's important to practice regularly and invest in high-quality materials like Modda Crochet Kit for Beginners, which includes all you need in one box and a free video course.
Additionally, join online communities like Modda Crochet Community or utilize their free crochet tutorials to keep improving your skills.
Don't miss out on these valuable resources!
Practicing Regularly
Practicing regularly is key when it comes to improving any skill, including crochet.
Set aside time each day or week to practice and you'll soon see progress in your projects.
It's important to not get discouraged if a project doesn't turn out perfectly at first - everyone makes mistakes!
One way to stay motivated while practicing regularly is by choosing small, achievable projects that build on previous skills learned.
This helps build confidence and prevents overwhelm from more complex patterns.
Another tip is to join an online crochet community where you can share tips, ask for advice, and show off completed projects - this can provide valuable feedback and encourage continued progress.

Investing In High-Quality Materials: Modda Crochet Kit For Beginners
If you're serious about improving your crochet skills, investing in high-quality materials is essential.
The Modda Crochet Kit for Beginners is a great option if you're just starting out.
With 100% Acyrlic Easy Peasy yarn and a comfortable crochet hooks included, this kit has everything needed to get started.
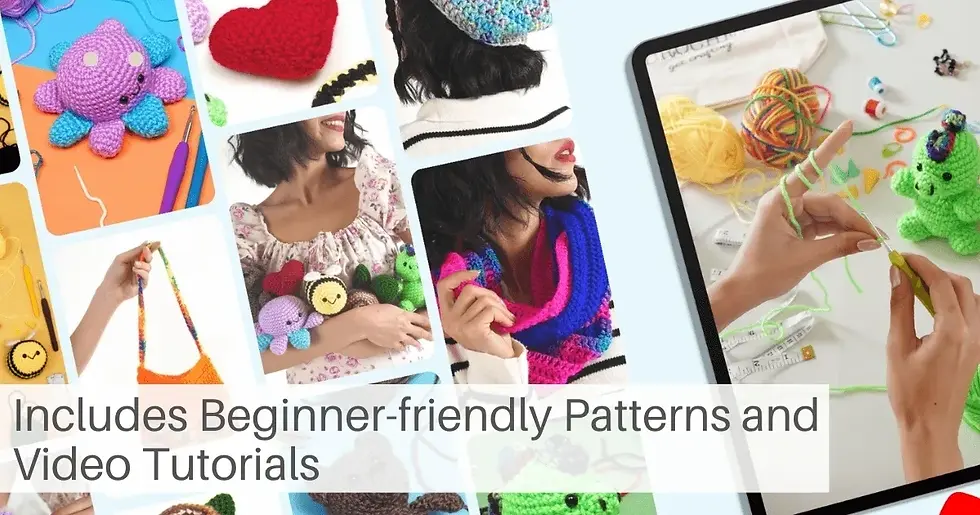
Not only does the Modda Crochet Kit for Beginners include top-notch materials, but it also comes with a comprehensive instruction book and access to the Modda Free Crochet Video Course online.
This makes it an excellent choice for complete beginners who want to learn the basics of crochet from scratch or those looking to sharpen their skills.
By investing in this quality starter set, you'll have all the tools necessary to make beautiful crocheted items that are sure to impress your friends and family.
Plus, with enough yarn colors provided and size hooks given, there's no limit on what you can create!

Utilizing Online Tutorials: Modda Free Crochet Video Course
Modda offers a fantastic free video course that provides comprehensive instructions for beginners wanting to learn how to crochet.
The step-by-step tutorials cover not only the basics but also more advanced techniques such as increasing and decreasing stitches, working in rounds, and reading crochet patterns.
The Modda Crochet Video Course is perfect for those looking for an interactive way to get started with this craft.
By joining the Modda crochet community, beginners get access to various techniques they can use to boost their skills in crocheting.
They will have helpful tips and tricks from experienced crafters that give them confidence as they start on their new hobby.
Furthermore, through these online resources, beginner crocheters become part of a supportive group where results are celebrated and encouraged by peers who are passionate about learning together.

Joining Modda Crochet Community
Modda Crochet Community is the perfect place to connect with other crocheters who are just starting their crochet journey.
This community offers helpful tips, feedback on your work and encouragement from fellow crocheters.
By joining this community, beginners can learn new techniques and stitch patterns while also receiving support and motivation.
Not only does Modda Crochet Community offer a space for socializing and learning, but they also provide access to exclusive video tutorials that cater to different skill levels.
This makes it easier for beginners to improve their skills through step-by-step instructions provided by experts in the field.
Joining Modda Crochet Community can help beginners feel empowered as they progress towards mastering the art of crocheting.
In conclusion, by joining Modda Crochet Community, beginners can get all the resources needed to start their crochet journey such as free crochet patterns for a variety of projects including scarves or blankets etc., along with professional guidance from experts via video tutorials or even workshops hosted online so no one ever feels isolated while learning something new!
Conclusion
In conclusion, the ultimate beginner's guide to learning how to crochet provides step-by-step instructions and tips for success.
Make sure to check out the recommended crochet kit for beginners by Modda, free easy-to-do crochet patterns, and the Modda Free Crochet Video Course to take your crocheting journey to the next level!

FAQ
What materials are needed to start learning how to crochet?
To begin crocheting, you'll need a crochet hook and yarn in a color of your choice. A beginner may also benefit from using thicker yarn and larger hooks for easier manipulation.
How do I hold the crochet hook and yarn while crocheting?
There are different ways to hold your hook, with variations including "pencil grip" or "knife grip." Experiment with different grips until you find one that feels comfortable for you. Similarly, practice holding the yarn in a way that allows it to flow smoothly through your fingers as you stitch.
What is the most basic stitch in crocheting?
The single crochet (sc) stitch is generally considered the most basic stitch in crocheting, and is often used as a foundation for more complex stitches.
How can I troubleshoot common problems while learning how to crochet?
If you find yourself struggling with uneven stitches or other issues during crocheting, consider slowing down your pace or focusing on specific parts of each stitch at a time - such as creating an even tension throughout each loop pulled onto your hook before continuing forward along the row or round being worked on. It can also be helpful to refer back frequently to instructional resources like videos or books while practicing new techniques until they become more natural over time.
![How To End A Crochet Project [Video Tutorial]](https://static.wixstatic.com/media/4ce1a6_33b886f54ac24c77bf5ad91d58f8ef56~mv2.jpg/v1/fill/w_980,h_515,al_c,q_85,usm_0.66_1.00_0.01,enc_avif,quality_auto/4ce1a6_33b886f54ac24c77bf5ad91d58f8ef56~mv2.jpg)


Comments